Tag: cooking

  • Sausages, sausages and more sausages

    Sausages, sausages and more sausages


    So what do you do when you have over 10 pounds of leftover Italian sausage? You put them to good use (Don’t ask where they came from). My son was determined to eat sausages for a week straight but his sister wanted no parts of that. I was able to create 4 meals before having to call it quits. The following are pics of the dishes (requested by the kids).


    What are some dishes you might have created using Italian Sausages?

    Go buy a pound of Italian Sausages and see what you can create. Now go forward and make memories


  • Grilled Chimichurri Salmon and Shrimp Flat bread Pizza

    Grilled Chimichurri Salmon and Shrimp Flat bread Pizza

    My kids are like most kids they love pizza. What makes them slightly different from most people’s children is that, although they love a good pepperoni pizza they much rather have something a little more upscale. I decided I wanted to make pizza out of freshly made flat bread. The above picture was the ending result. Grilled Chimichurri Salmon and Shrimp Flatbread pizza.

    I am going to include the links to the recipes I used to get this wonderful meal made. The first thing I did was to prepare the seafood which meant I needed to make my Chimichurri sauce. Chimichurri is an Argentine sauce used mainly with grilled meats. I used it on seafood and had pretty tasty results. I chose this particular Chimichurri Sauce because it did not use cilantro ( I am not a fan of cilantro. It’s one of those things you either love or hate . I hate it). I reserve at least a 1/2 cup of the sauce to be used later. I then seasoned the shrimp and salmon steaks with Old Bay seasoning in separate containers. I then  covered them the seafood in the Chimichurri sauce and refrigerated them.

    We are fans of onions so I set out to caramelize onions for an additional topping on out pizza. Making caramelized onions is pretty easy but if you need a recipe to follow here’s an easy one, The onions take on average from 30-45 minutes to cook so plan accordingly. In keeping with the time issue I proceeded to make the dough for the flat bread, it needs an hour to rise. I found this recipe on the New York Times website. I only made 2 changes:

    1. I used 1/2 the amount of salt called for in the recipe.

    2. I used a grill pan instead of firing up the outdoor grill.

    Instead of using a tomato base for the pizzas I decided to do a ricotta cheese base. I used 1 cup of ricotta cheese and stirred in a Tablespoon of McCormick’s Montreal seasoning, 1 teaspoon of Italian Seasoning and  3 cloves of chopped garlic (you can use more or less garlic depending on your preference). Once my flat breads were made and cooled I spread them with the ricotta cheese mixture to start my pizzas off. I took the seafood out of the fridge and grilled them in my grill pan making sure not to over cook. When the salmon was cool I used my hands to break up the fish into nice flakes, I didn’t want hunks of fish but rather sexier pieces of fish. I placed the ricotta covered flat bread on a baking sheet(I was able to do 2 at a time) and continued laying the yummy goodness on top. I added shredded cheese next ( Monterey Jack and Mozzarella), then the caramelized onions followed by the seafood. I placed it in a 400 degree oven for about 10 minutes or until the cheese melted. Once It came out I drizzled some of the reserved Chimchurri Sauce on top. Viola Pizza is done.

    Let me know if you make this dish. I would even like to see pictures. Email me at info@TheChefInPearls.com. Now go forward and make memories.

  • Roast Beef Sandwiches

    Roast Beef Sandwiches

    Normally on a Sunday I tend to be a little more traditional with a full cooked meal. This Sunday was a little different. I wanted to go to the farmers market which for me is therapeutic. It relaxes my mind and brings out my creativity.

    Well after more than an hour in the market I realized we had passed the hour for brunch and moved into the hour of a late lunch or an early dinner. What shall we have. Sandwiches. What kind? Roast beef chimed my daughter. And now i was on the hunt for the right fresh ingredients to make the ultimate roast beef sandwich.

    I started off with the roast beef of course. What type of bread shall hold all this goodness. Well the market makes a french loaf perfectly sliced for sandwiches. Done deal, It took a place in the cart. I know I wanted to make a spread. What goes best with beef than some fresh herbs, oregano and flat leaf parley. I’d incorporate into some cream cheese once we got home. What other things did I want to adorn what was to be the ultimate roast beef sandwich. I wanted heirloom tomatoes but the we out so I went with yellow tomatoes instead. caramelized onions and mushrooms made the list followed by alfalfa sprouts and green leaf lettuce. Home we headed.

    I immediately started the onions and mushrooms. Then I created the spread I envisioned. I used 4 oz. of cream cheese that I softened in the microwave for a few seconds then I added 2 tablespoons each of chopped parsley and oregano, a pinch of salt and black pepper. then combined it all. I used it on one side of the sandwich. I added butter with a little oil to a pan then added the bread slice with no spread to the pan . I added cheese on top of that, then roast beef, the mushroom onion mixture, topped by two slices of the yellow tomatoes, alfalfa sprouts, lettuce and the slice of bread that had the herb spread on it. I toasted the sandwich until golden brown on both sides. Removed and cut in half. Boy did everyone enjoy it..

    If you re-create this sandwich let me know. Now go forward and make new memories.

  • Summer Edition….Ladies Lunch

    Summer Edition….Ladies Lunch

    15_CIP_LadiesLunchAd

    So its that time of year again. Mark your calendars. The Chef In Pearls will be hosting her Summer Edition of the Ladies Lunch. Sunday June 7, 2015 from 3-6 pm.  We will be taking a trip to the Greek Isles for this luncheon. You don’t need a passport just a fork. Visit www.TheChefInPearls.eventbrite.com to purchase your tickets.  In addition to a wonderful lunch you’ll also receive a gift bag. As an extra bonus Atlanta Touch Therapy will be in attendance offering a special rate for 1/2 hour massage for attendees. So come along for an afternoon of good eats, good company and a good time. Let’s make new memories together.

    15_Menu_SpringFinal
    Lunch Menu
  • A Quickie…..Building a Better Burrito

    A Quickie…..Building a Better Burrito

    How do you build a better burrito? It’s pretty simple… you have to start with fresh Ingredients. That’s what draws us to places like Chipotle. They promise us fresh ingredients. It’s one of the reasons the McDonald’s corporation purchased the sweet Mexican chain. It wanted to be associated with fresh ingredients. Well if a big conglomerate like McDonald’s knows it’s all about the fresh then you should know it too.

    I wish  knew how t make my own flour tortilla because I would have but since I don’t I purchased some from my local supermarket. Everything else was freshly made. I made a pot of lime rice with chopped parsley stirred through. Dried black beans that I soaked over night and then cooked down with chopped onions and spices. Ground beef that I browned with cumin, salt, black pepper, chipotle peppers, adobo sauce and fresh garlic. Corn salsa with diced red onions, jalapeno, lime zest, lime juice, kosher salt and black pepper. And of course fresh guacamole made with avocado,diced red onions, lime juice, kosher salt and a dash or two of siracha sauce. I sautéed some bell peppers and onions. We cannot forget the cheese, Sargento’s Mexican blend. And of course a little sour cream makes it extra yummy.

    This is just one idea for a burrito but the options are endless. You could go pork or chicken, grilled veggies, multiple kinds of beans, potatoes just whatever your heart desires but remember to keep it fresh. Now get in that kitchen and go make memories.

  • St. Patrick’s Day

    Yesterday was St. Patrick’ s Day a celebration that some many non-Irish have come to make a part of their lives.  I participate yearly from wearing something green to cooking corned beef and cabbage to occasionally going out for cocktails with friends.  This year I created a menu  that included a Honey Mustard & Brown Sugar Glazed Corned Beef with Colcannon. And for dessert Toasted Almond Scones and Chocolate Chip Scones with freshly made Lemon Curd. It turned out wonderfully and the family enjoyed it.

    I am including links to recipes I used. So feel free to try them out and let me know what you think. The corn beef was created by boiling it in water with a bay leaf , thyme, allspice berries and the seasoning packet included with it, 50 – 60 minutes per pound. Then finishing the last hour in the oven. In 30 minutes pull out corned beef and top with honey mustard and brown sugar then return to oven for last 30 minutes. Remember to slice against the grain of the meat. Traditional Irish side Colcannon. The base for the scones can be found here. The lemon curd was made with the ingredients from this recipe but the technique from here.

    For the day after I made Sweet Potato Corned Beef Hash for breakfast with the obligatory Fried Egg. That was good eats.

    In addition to the wonderful food I was able to have a mini photo shoot with my in-house photographer. I think she did an awesome job. I featured a pair of jeans two different ways for this St. Patrick’s Day Celebration.

    Tee-Shirt- Old Navy                                                                                                                      Blouse- JCPenney’s

    Jeans-Lane Bryant                                                                                                                         Jeans-Lane Bryant

    Sneakers- PFFlyers-6pm.com                                                                                                      Heels-Tried & True from my closet                                                                                                                                                                                          (basically I can’t remember where I purchased them from)

    Which look would you have gone for? I hope you St. Paddy’s Day ( yea I learned that it’s not Patty but Paddy) was fun. Now go forward and make new memories.

  • A Quickie….Chicken Pot Pie

    A Quickie….Chicken Pot Pie

    So while perusing a Facebook group dedicated to people who like cooking, I came across someone’s picture of a pot pie they made. It instantly brought me back to my childhood, where my Mom had a freezer with individual boxes of pot pies for us (something for lunch she wouldn’t have to slave over and we liked them). We even had a choice of what kind we could eat, chicken or turkey. I loved them. One it wasn’t Jamaican food ( it was food I could relate to with the other kids in school) and two I had come to love pie crust( little did I know at the time that was an inferior product compared to what I would later learn to make).

    (In my Gollum voice) I must have the pot pie. So what I would have a late lunch. It would be well worth it. And so my journey began into making an individual chicken pot pie for myself. First things first, I needed to make the pic crust and get it in the fridge so that the fat and flour could make happy time together while chilling out (if you want a truly flaky dough you must use butter and shortening to achieve it). Then I proceeded to chop vegetables and dice chicken breast for the filling and….. And well 2 1/2 hours later I was enjoying (with a slightly burned tongue) Chicken Pot Pie.

  • A Healthier YOU

    A Healthier YOU

    I know on the blog I share a lot of things that may not be so health conscience but they aren’t meant to be eaten on a daily basis. If you follow me on social media you can get a feel for my daily eating habits, which isn’t all bad. With that being said I approached Miss Ebby K of I am EbbyK (a blog about fashion, fitness and faith) about being a guest on her blog. She loved the idea. So I share with my readers what is going to be shared with her readers. I hope you guys enjoy and take a moment to visit Miss Ebby K’s blog. Now go forward and make memories.
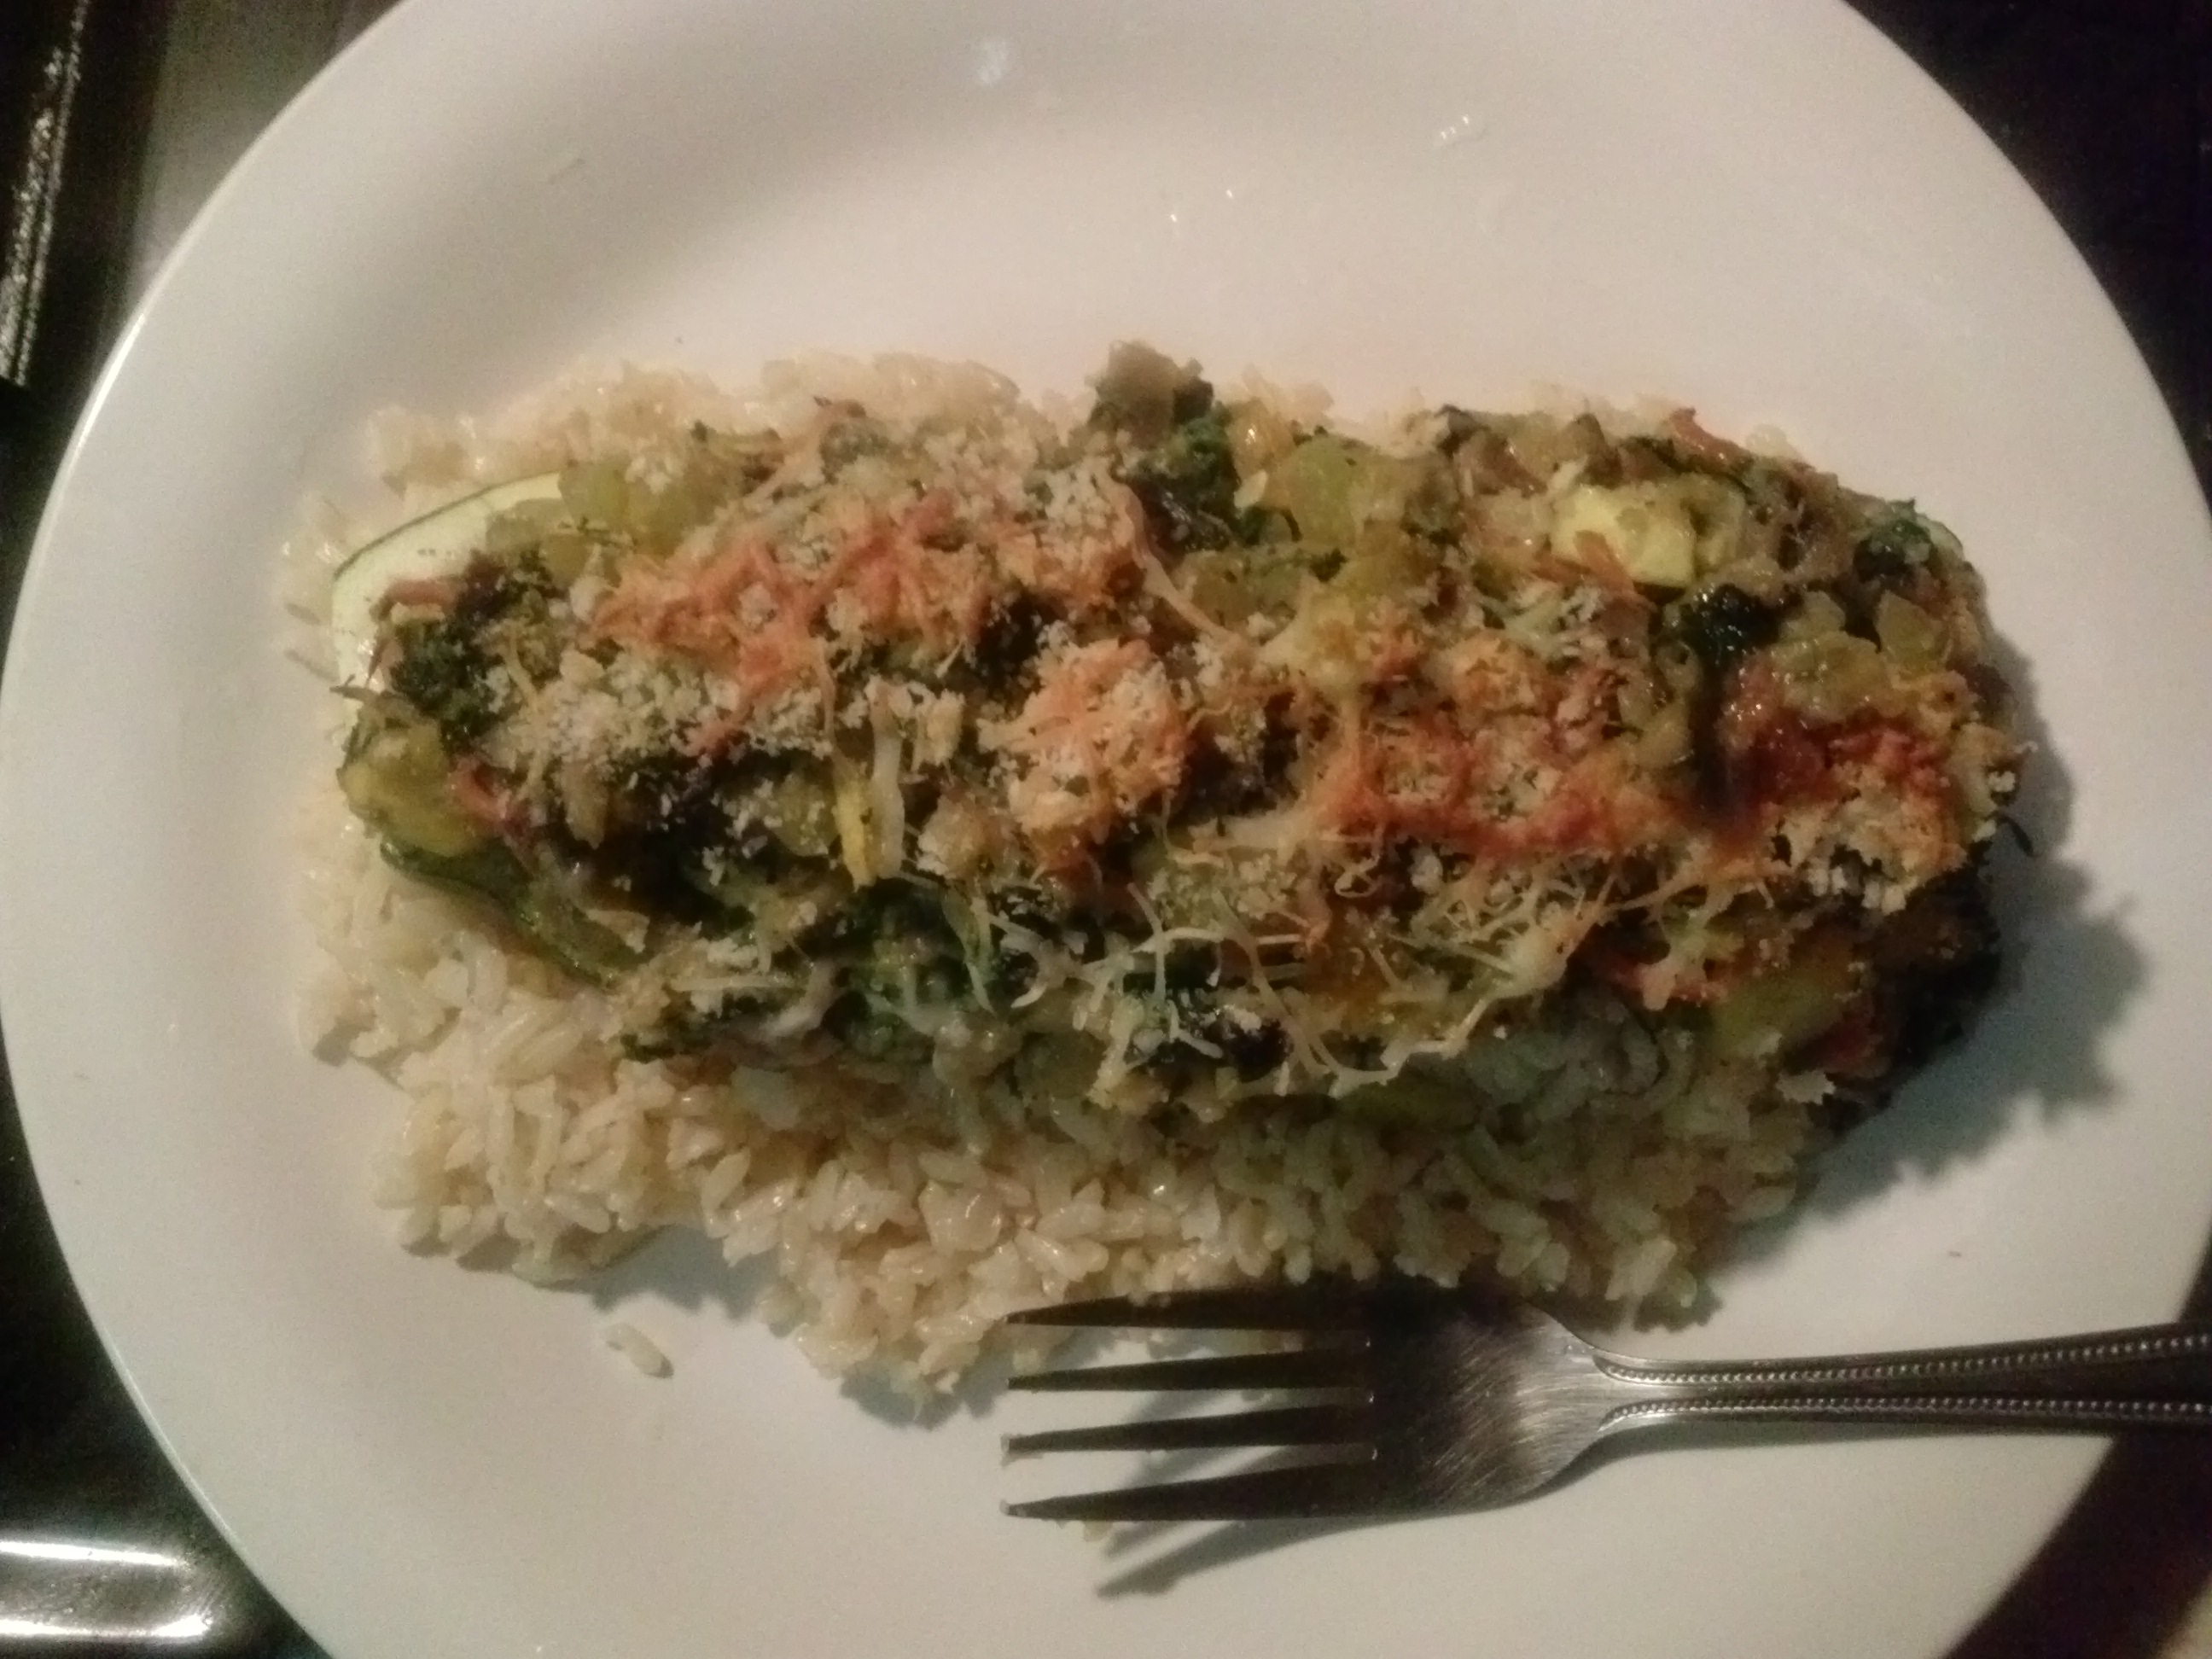
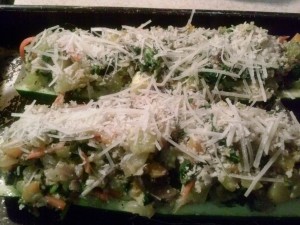
    Stuffed Squash

    The food pyramid says …oh wait it’s no longer a pyramid it’s now a plate. Right, so it suggests that as an adult woman you should get between 2-2½ cups of veggies daily and as an adult man you should get 2½-3 cups of veggies daily. So I’m always looking for ways to get vegetables in my meal. From adding fresh spinach and sweet bell peppers to my scrambled eggs or adding shredded zucchini and carrots to my spaghetti sauce when I’m creating an Italian styled meal. In the following recipe you can more than meet your daily vegetable requirement. I served it with brown rice cooked with vegetable broth and olive oil (instead of butter).


    Stuffed Zucchini

    serves 2


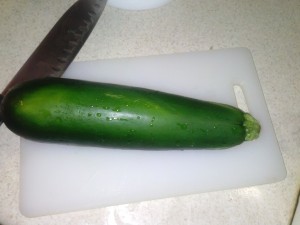
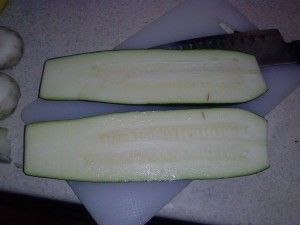
    1 large zucchini 7”-8” long

    1 small yellow 4”-5” long squash, diced

    3 mushrooms (white button or baby portobella), stems removed

    1-2 cloves of garlic minced

    ½ of small onion, diced

    ¼ sweet bell pepper, diced

    1 stalk celery, diced

    1 small carrot, shredded

    ¾ cup kale, rough chopped

    ¾ cup spinach, rough chopped

    ¼ cup of broth/stock ( chicken or vegetable)

    ¼ – ½ cup of panko breadcrumbs

    3 tablespoons shredded parmesan cheese

    Olive oil

    Kosher salt

    Black pepper


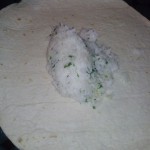
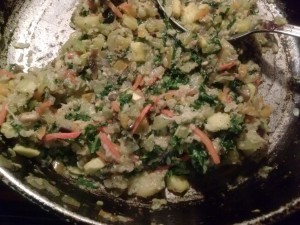
    Heat oven to 450. Half zucchini. Using a spoon remove the core of the zucchini creating a shell. Save core to the side. When both halves are cored drizzle with olive oil and season with salt and pepper. Take the reserved zucchini cores and dice.  Heat a saute pan with 2 Tablespoons of olive oil add onions,bell peppers, celery, yellow squash and diced zucchini core. Saute vegetables for about 2-3 minutes. Add garlic, carrots, spinach and kale cooking for an additional 2-3 minutes. Season with salt and pepper to taste. Add broth and then add breadcrumbs until mixture starts to come together. Turn off heat. Add 2 tablespoons of parmesan cheese. Fill zucchini halves with mixture, over stuffing. Sprinkle breadcrumbs and remaining parmesan cheese on top of halves then drizzle with olive oil. Bake in oven for 15- 20 minutes or until shell is tender.


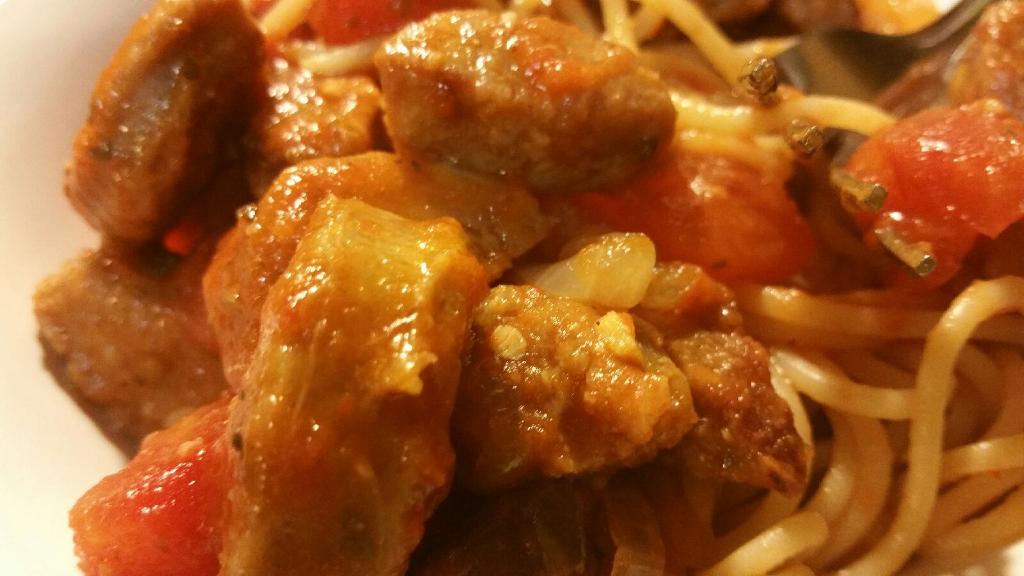
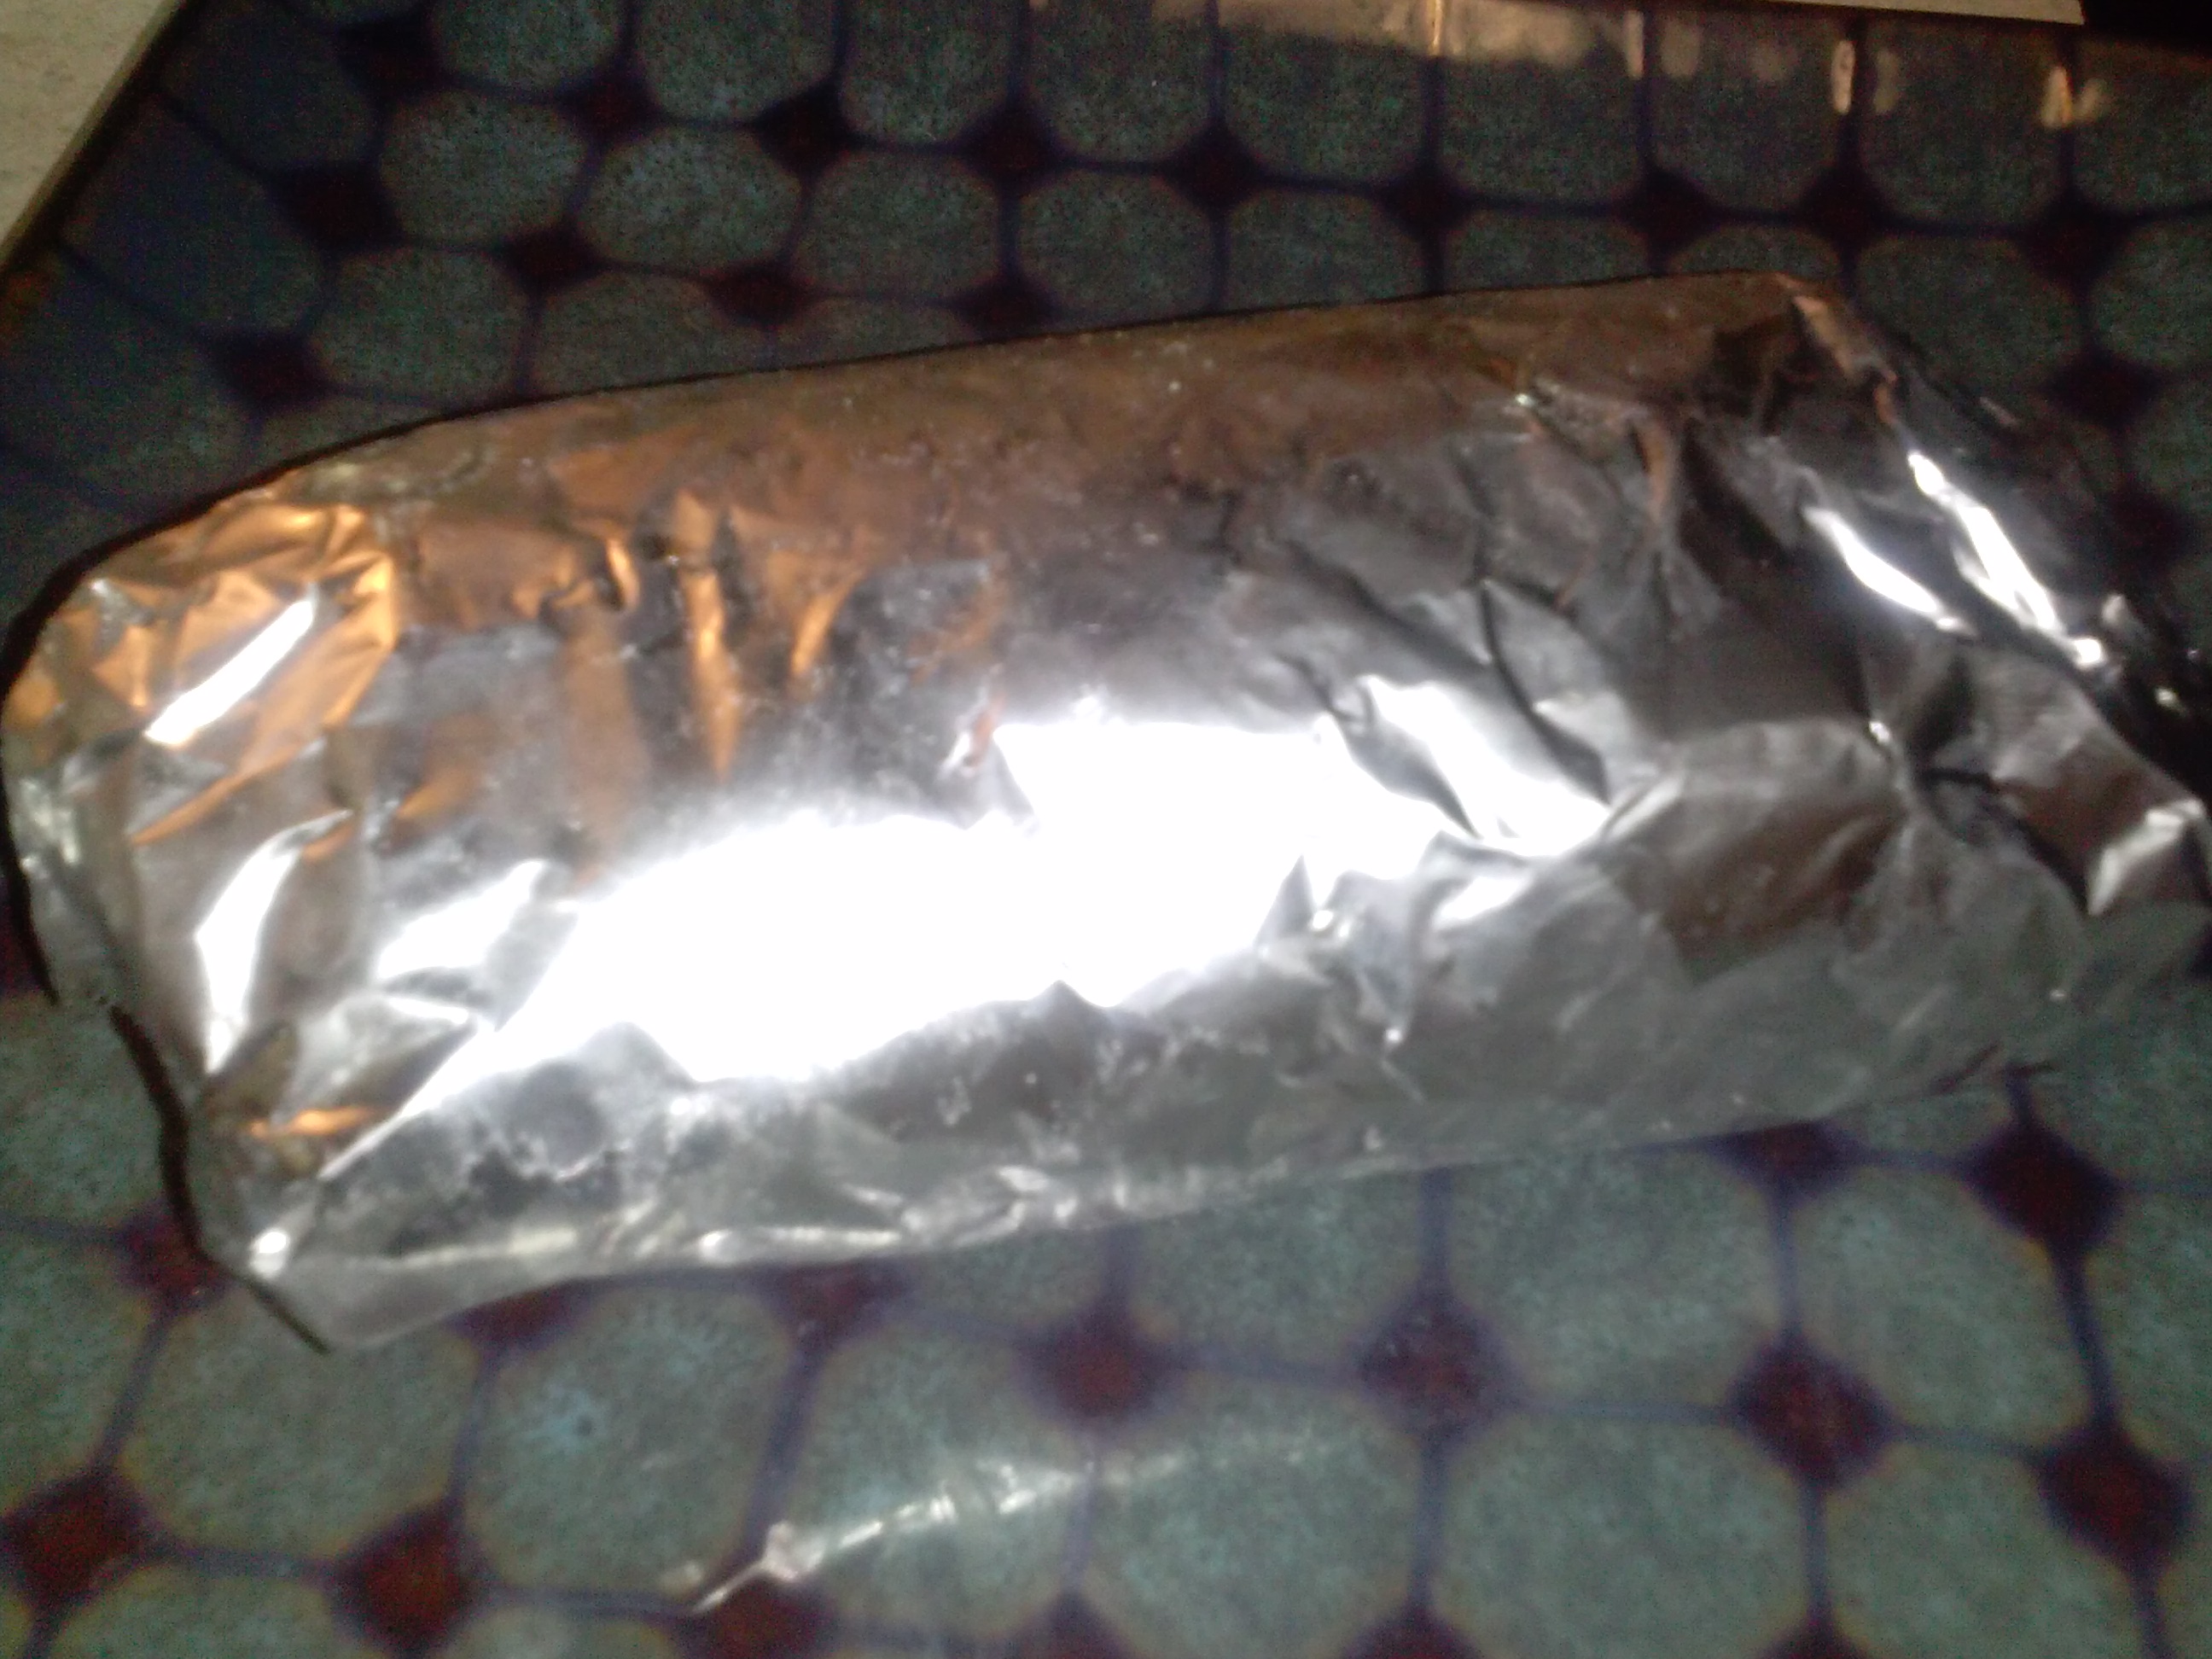
    You know that spaghetti sauce I mentioned earlier in the post? Why not take a chance on another stuffed squash. Buy a spaghetti squash, half it, scoop out seeds and then place it cut side down into a casserole dish. Add enough broth to cover the bottom of the pan. This helps to steam the squash and adds flavor. Cover with aluminum foil and bake in a 400 degree pre-heated oven for 30-40 minutes or until tender. Remove squash from pan. Saute your favorite vegetables and add to your favorite sauce. Take a fork and flake up the spaghetti like strands of the squash then top with your sauce mixture and parmesan cheese. Bake until cheese is melted, 5-10 minutes. Eat with a side salad.


    I hope this moves you closer to your healthier you in 2015. Now go forward and make memories.


    The Chef In Pearls is a blog where food and fashion meet. A retired Chef learning to live life to the fullest. Please follow on Facebook, Instagram and Twitter at @TheChefInPearls  

  • Cranberries Uncanned (Holiday Series Pt 3)

    Cranberries Uncanned (Holiday Series Pt 3)

    Are you still eating cranberry sauce from a can? I know I say I won’t judge you but I will give you the side-eye for not going fresh. I mean, once you learn how easy it is to make cranberry sauce from scratch you’ll never go canned again.

    I want you to walk away from this post with not only the know-how on how to make cranberry sauce but that cranberry sauce ain’t just for turkey. That’s right i said it. You can do so much more with cranberry sauce like appetizers, drinks, entrees and desserts. The sky’s the limit or at least your imagination.

    Basic Cranberry Sauce

    1 12oz. bag of cranberries (fresh or frozen)

    1 cup of water

    1-2 cups of granulated sugar

    Wash and sort cranberries. Place cranberries in a sauce pan with water and 1 cup of sugar. Allow to simmer. You can add more sugar depending on how sweet you like your sauce. After about 10 minutes of cooking and you can no longer hear the berries popping you can turn off stove. Pour sauce into a bowl and allow to cool. Sauce thickens as it cools.

    Cranberry Sauce
    Cranberry Sauce

    Here are some other dishes I used cranberry sauce in.

    November 23 2014 021
    Baked Brie topped with warm Cranberry Sauce
    Pork Tenderloin Medallions and Whipped Sweet Potatoes with a Cranberry- Pomegranate Sauce
    Pork Tenderloin Medallions and Whipped Sweet Potatoes with a Cranberry- Pomegranate Sauce
    Wine Spritzer made with Cranberry, your favorite white wine and topped with seltzer.
    Wine Spritzer made with Cranberry Sauce, your favorite white wine and topped with seltzer.
    Cranberry Shortcake made with a cranberry, apple & pear compote
    Cranberry Shortcake made with a cranberry, apple & pear compote

    I hope the post has you ditching the can and being inspired by fresh cranberries.  CIPapproved


  • 2+2+1= Gravy (Holiday Meal Series Pt 2)

    So your gravy is…well…not the best.  Lumpy is just the start of what makes your gravy unappealing.  So what do we do to make it better? Well we turn to a little math, If you have this little equation you are well on your way to better gravy. 2 + 2 +1= Perfect Gravy. That is 2 Tablespoons of fat plus 2 Tablespoons of flour plus 1 cup of liquid and you’ve got gravy kinda. The only special equipment I suggest for this gravy making task is a whisk,it  helps to eliminate lumps.

    2 Tablespoons  Fat ( butter, olive oil or fat drippings from meat)

    2 Tablespoons all Purpose Flour

    1 cup Liquid  (stock,broth or meat drippings)

    Salt & Pepper to taste

    Melt fat in a sauce pan. Once melted add flour and allow to cook for about 1-2 minutes. Then add liquid while whisking to prevent lumps. Allow to simmer until thickened 3-5 minutes. Taste so that you can adjust seasonings as needed.

    Once you have this basic gravy down then you can get a little fancy with it.  You can make a mushroom beef gravy by sauteing freshly sliced mushrooms before melting fat and adding flour and using either a beef broth, stock or dripping from cooked beef. Or maybe you want something a little spicy add cracked peppercorn to the melted fat before adding flour.  The varieties are limitless and left only up to your imagination and taste-buds.

    Now you’ll be the champion of gravy at your next holiday meal